Friday, April 19, 2013

How to Make Your Scrapbook Album Fancy on the Outside


I've been working so hard lately on finding the perfect scrapbook layouts on pinterest. I wanted to make our family's Disney vacation look beautiful in our album. But I just bought a plain black album. I needed the outside of the album to be just as beautiful as the inside! I could have bought a Disney album at a variety of stores, but I really didn't want to spend $30 or more. I did a Disney theme, but this same style can be used on any album. The next one I'm going to try will be words or initials.


You just need a few simple supplies. Get any size album with a fabric cover.
I used a 12x12 album.


Take a sheet of contact paper & draw your design. 

Then cut it out & place it on your album.


You need some fabric paint & a paint brush. 
I used Tulip Diamond Glitter paint and this hard stencil brush.


Using a stencil painting technique, I painted all along the edge of the contact paper. 
Painting this way with the tapping motion & using the thick fabric paint keeps it from bleeding underneath the contact paper.

The paint recommends letting it dry flat for 4 hours. 
I was excited to see how it looked so I only let it dry about 30 min. before 
I peeled off the contact paper.
I think it turned out great!! 

I even added a Disney "D" to the spine. It's so pretty and makes it easier to pick out on my shelf.  I'm ready to do another one!


Monday, August 27, 2012

Melted Crayon Glass Ornament


I love all the melted crayon art on pinterest!! And I've had these glass ball ornaments for years that I wasn't sure what to do with. This cute baby game together in about 5 minutes!


Take one ornament and a couple crayons of your choice. I used purple & teal.


I broke them into 1/2 inch pieces and put 3 of each color in the ornament.


Heat with a hair dryer and swirl around as the crayons start to melt. You may want to wear a glove or hold the ornament with a washcloth. As I was turning it my fingers were feeling the heat. 
**Don't forget to cover your work area w/ newspaper in case any melted crayon drips out the top.


Isn't it pretty!?!


Add a pretty ribbon and hang on the tree. 5 minutes to prettiness. 
I can't wait to try different color combinations!!

Tuesday, August 7, 2012

Yellow House w/ White Trim

I'm posting this one for my mom. : ) What a pretty house. But she couldn't convince dad to have their house painted like this!


Wednesday, May 2, 2012

30 sucks

30 doesn't really suck, but I thought this was a fun gift for my sis-in-laws surprise party.
The day before the party I got a pkg. delivered in the mail. The base is a big piece of styrofoam that I covered with scrapbook paper. 

Here was my inspiration.
They have a tutorial on their site:
http://sistersstuff.blogspot.com/2010/07/30-sucks-tutorial.html


Saturday, April 21, 2012

Rag Quilt

Randi told me she wanted a quilt with unicorns AND rainbows. I thought that would be close to impossible, but then, tho & behold, I found this fabric at Hancock.
She was super excited and said it was "so pretty!!"
I found a few other fabrics with rainbows. My mom is a big quilter and had some miscellaneous pastel fabric that she gave me. I had to cute 260 squares - 130 for each side. Not my favorite part!
This was not my easiest project. I think the batting I chose for the inside was too thick and sometimes left me with spots where I missed sewing of the edges together.
But all in all, I was happy with how it turned out. And, most importantly, so was Randi!!
To see the inspiration and tutorial, go to Imperfect Homemaking blog here:
http://www.imperfecthomemaking.com/2012/01/easy-thrifty-pretty-rag-quilt-tutorial.html


Friday, March 23, 2012

Monogram wall hanging

I'm sure you've seen these on etsy.com. Super cute monogram wall hangings.

You can find them here: http://www.etsy.com/listing/79692400/custom-button-letter-wall-art-orange

This is the one I made.

I was really a lot easier to make than I thought. I should have taken photos as I was working on it, but I was just so excited to get it done. And my hubby gives me a hard time if I have too many projects going at once, so I wanted to prove him I would finish it in 1 day!! : ) Luckily I have been saving buttons for years and found a bunch at a garage sale last summer.

Saturday, March 10, 2012

Old Window Wall Art

My parents live in an old house that is over 100 years old. Gradually over the last few years they've been replacing some of the old windows. The last time I was there they had just replaced this old window.
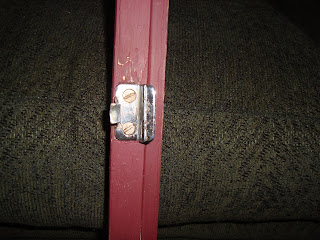
I removed any hardware and sanded it down.

First I painted it brown for a base, then a burgundy wine color over the top.

I lightly sanded and distressed the window so you could see the brown or wood underneath the burgundy color. I cleaned up the hardware that I wanted back on and replaced it. I also add some hangers to the back so I could put it on the wall.

Tie on hooks with twine, add photos and voila! - it's done.

Some of my inspirations:
http://pinterest.com/pin/66287425735187212/